Connect the assistant
Paste an Oberik project id and key into Settings, test the connection, and publish the skill pack once.
The writing assistant runs on an Oberik project you own. Oberik hosts the agent, indexes your sources for search, and routes model calls through a provider key you attach. Lecture Studio never sends your project key to the assistant page: the app mints short-lived tokens from it in Swift and hands only those over.
Everything else in the app works without a connection: the editor, the preview, presenter mode and the git bar. The chat and the source index need it.
On the Oberik side#
The step-by-step guide shows every screen. In short:
- Create an account and a project at oberik.com.
- Add a model provider (OpenRouter, OpenAI or Anthropic), pick a default model and an embedding model.
- Allow the capabilities the app uses: chat, documents and RAG, todo list, computer, and web search if you want it. Turn on image and file input so you can drop files into the chat.
- Create a project key under API keys and copy the project id from Connect the SDK.
In the app#
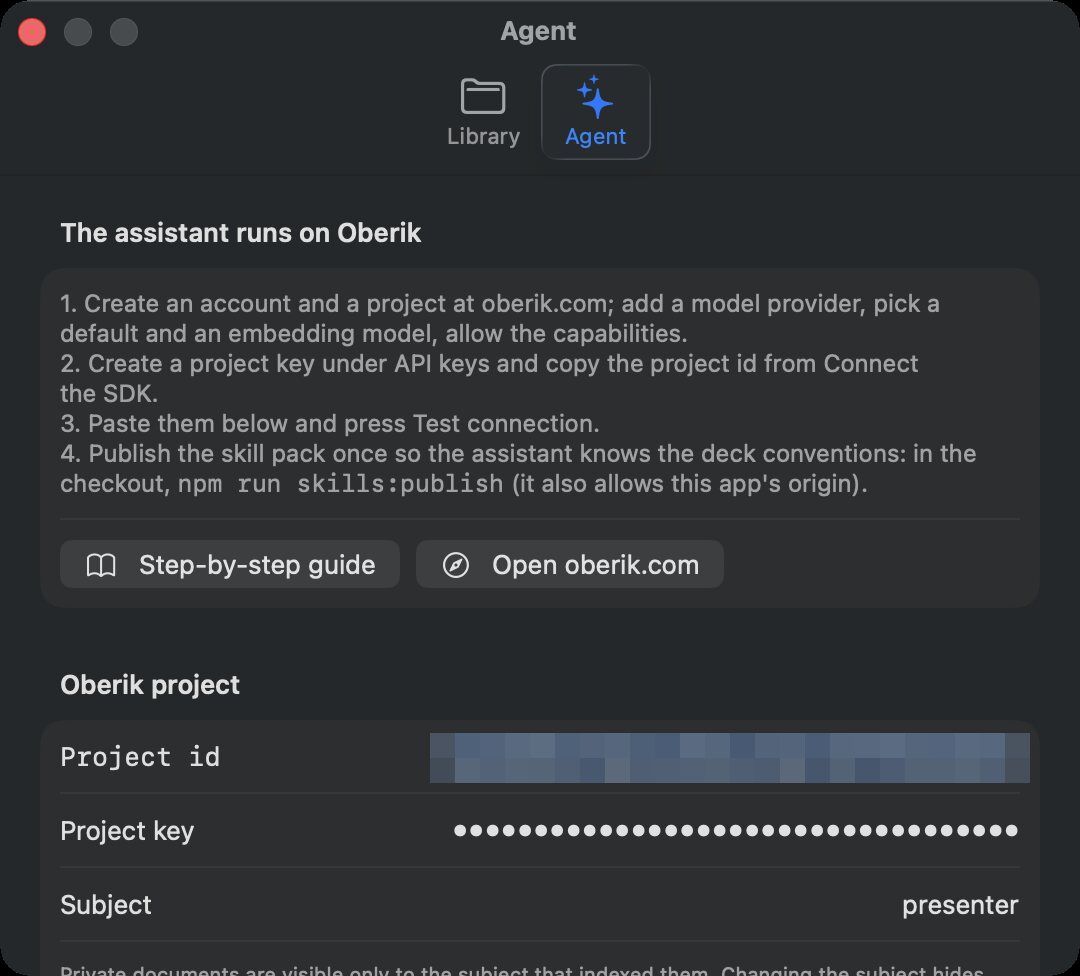
Open Settings (⌘,) and the Agent tab.
| Field | What it is |
|---|---|
| Project id | The UUID shown under Connect the SDK on Oberik. |
| Project key | The key that starts with pk_. Stored in the macOS Keychain. |
| Subject | The name your indexed sources are filed under. Defaults to presenter. |
Then:
- Save writes the id and subject to the app's preferences and the key to the Keychain.
- Test connection mints a token and asks the assistant for a word. The status line reports the token's capabilities and the reply, or the error.
- Import from .env is for developers: it reads
OBERIK_PROJECT_ID,OBERIK_PROJECT_KEYandOBERIK_SUBJECTfrom a.envfile in a checkout of the app's repository.
The Getting started card and the chat panel react at once: as soon as an id and a key are saved, the chat's "Connect the assistant" notice turns into the composer.
About the subject
Private documents on Oberik are visible only to the subject that indexed them. Changing the subject hides the sources indexed so far, until they are indexed again under the new name. If several people share one project, keep one subject per person.
Publish the skill pack once#
The assistant knows the deck conventions through a skill pack: how a Marp deck is structured, how to check slides, how to write speaker notes and an instructor guide, how to save images. The pack is uploaded to your project from a checkout of the app's repository:
git clone https://github.com/ekremcet/lecture-studio.git
cd lecture-studio
npm install
cp .env.example .env      # fill in OBERIK_PROJECT_ID and OBERIK_PROJECT_KEY
npm run skills:publish
The command also sets the system prompt and allows the app's origin, http://127.0.0.1:3005, which the hidden agent page runs under. It is a one-time step per project. An in-app button for it is planned.
Check it works#
Open any course. The course chat shows starter buttons instead of the connect notice. Ask something small, for example "Summarize the sources", and watch the working panel report what the assistant is doing.