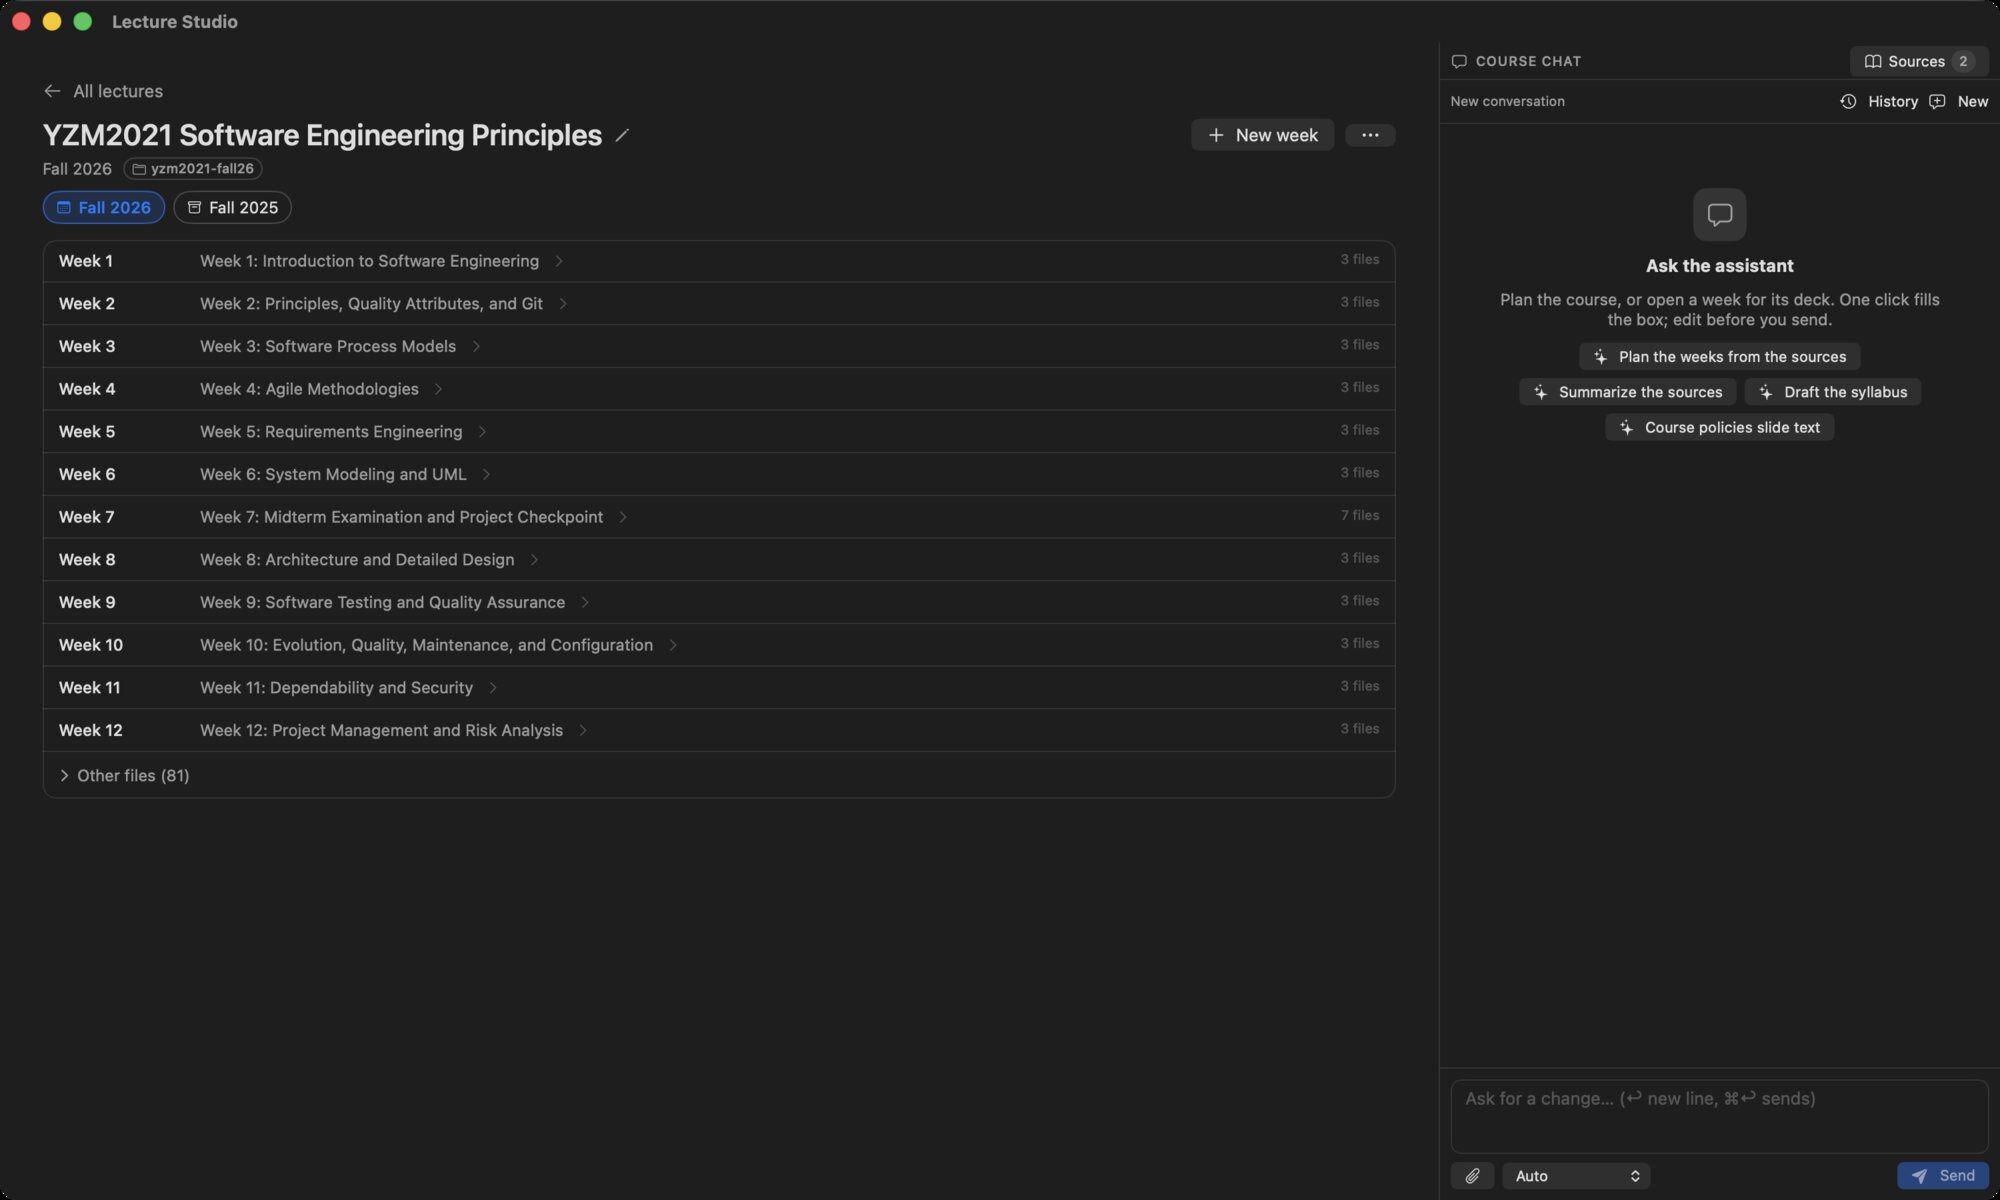
The course screen
The units of a course with their deck titles, the term switcher, the course menu, and the course chat.
Opening a course card shows its units on the left and the course chat on the right. A talk skips this screen and opens its deck directly.
The header#
- All lectures goes back to the library.
- The title, with a pencil to edit the course.
- Under the title: the term, a folder chip that reveals the folder in Finder, a GitHub or Repository chip when the folder has a web remote, and an Archived chip when the course is archived.
- One capsule per linked term when the course has more than one. Click a term to open it. See Terms.
- New week (or session, module, and so on: the course's unit word) creates the next unit. See Units and files.
- The ⋯ menu:
- New term from this course…
- Compare with another term… (needs at least two linked terms)
- Make this a talk (one deck) or Make this a course (numbered weeks)
- Archive or Unarchive
- Hide from the studio (not a course or a talk)
- Remove…
Unit rows#
Each row shows the unit label, the deck title (or the file count when there is no deck), and chips for the first files in the unit. Click a row to open the unit in the workspace.
Folders that are not numbered units, such as research or archive, and loose files in the course folder are grouped under Other files (N), collapsed by default. They open in the workspace too.
Empty course#
A course without units says No weeks yet and offers New week, Sources (or Add course sources when there are none yet) and a link, This is a talk, not a course, for the case where the folder should hold one deck.
The course chat#
The right column is the assistant in the course scope. It searches the shared sources and the course's own sources, and starts with four suggestions:
- Plan the weeks from the sources
- Summarize the sources
- Draft the syllabus
- Course policies slide text
The Sources button above it, with the count chip, opens the sources dialog. Unit-level sources are managed from the workspace.