Setup guide
Connect Lecture Studio to Oberik.
The writing assistant runs on an Oberik project you own. Ten minutes, once: create the project, give it a model, allow what the assistant may do, copy the project id and key into the app.
Everything else in Lecture Studio works without this: the editor, the preview, presenter mode, exports. The chat and source search need it.
Step 1
Sign up and create a project
Create an account at oberik.com, then press New project. One project is one workspace: your sources are indexed in it and the assistant answers from it. Name it after the app, for example Lecture Studio.
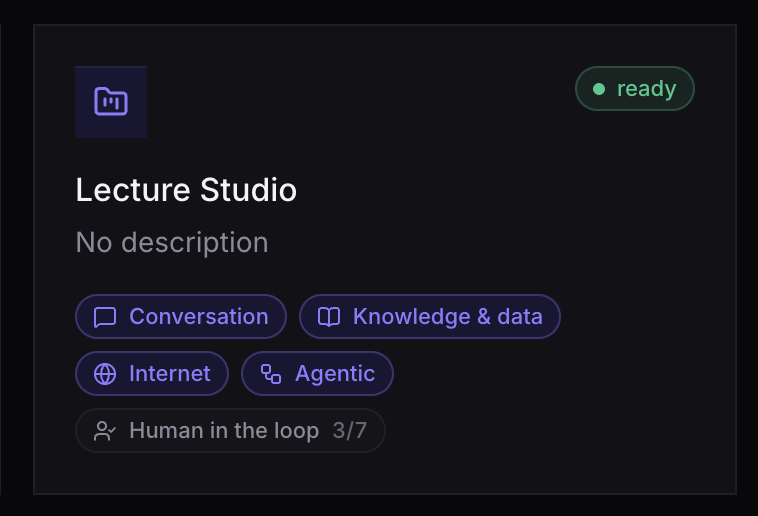
The New project button, and the project card once it is ready.
Step 2
Add a model provider
Oberik brings no models of its own; it routes through your own provider key. Open the project's LLM & limits page and press Add provider. OpenRouter is the simplest single key that reaches many models; a direct OpenAI or Anthropic key works too. Each link opens the page where that provider issues keys. After saving, the provider lists the models it can reach.

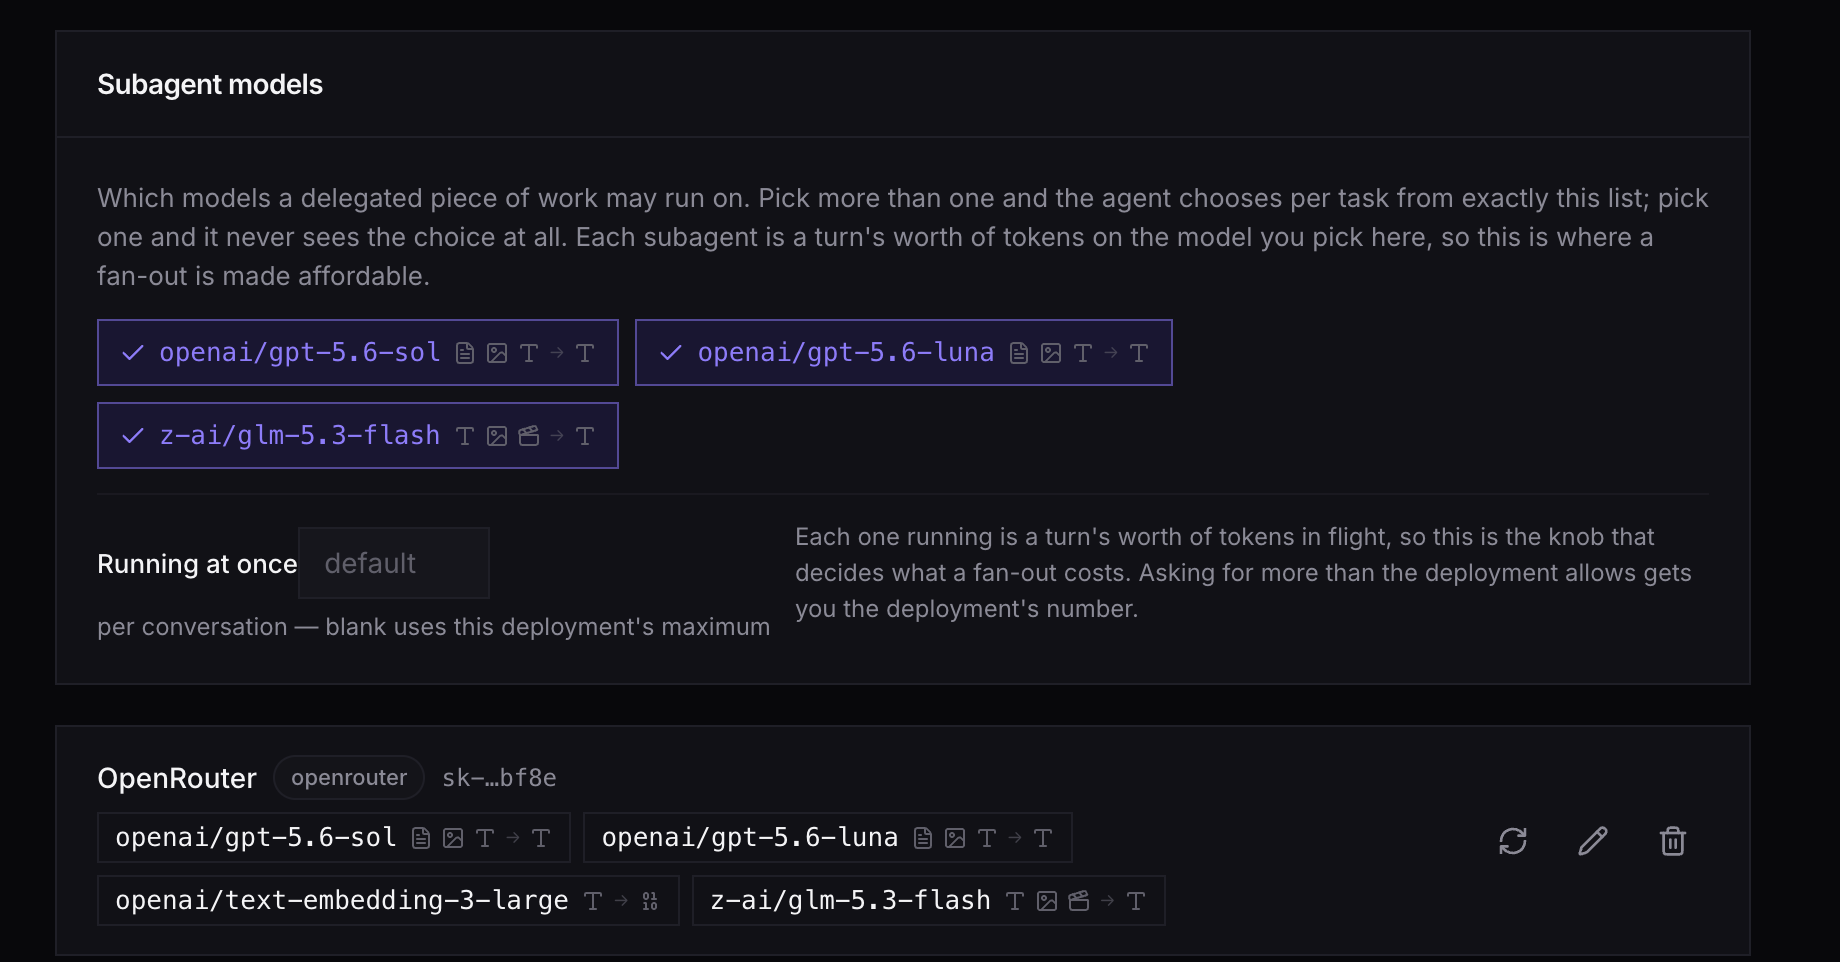
Add provider, then the provider row with its models.
Step 3
Pick the default model
Under Default model choose the model the assistant answers with when a request names none. Model per request is optional: with it on, short questions go to a cheaper model and long jobs to the strong one. Lecture Studio shows this as "Auto" in the chat's model menu.
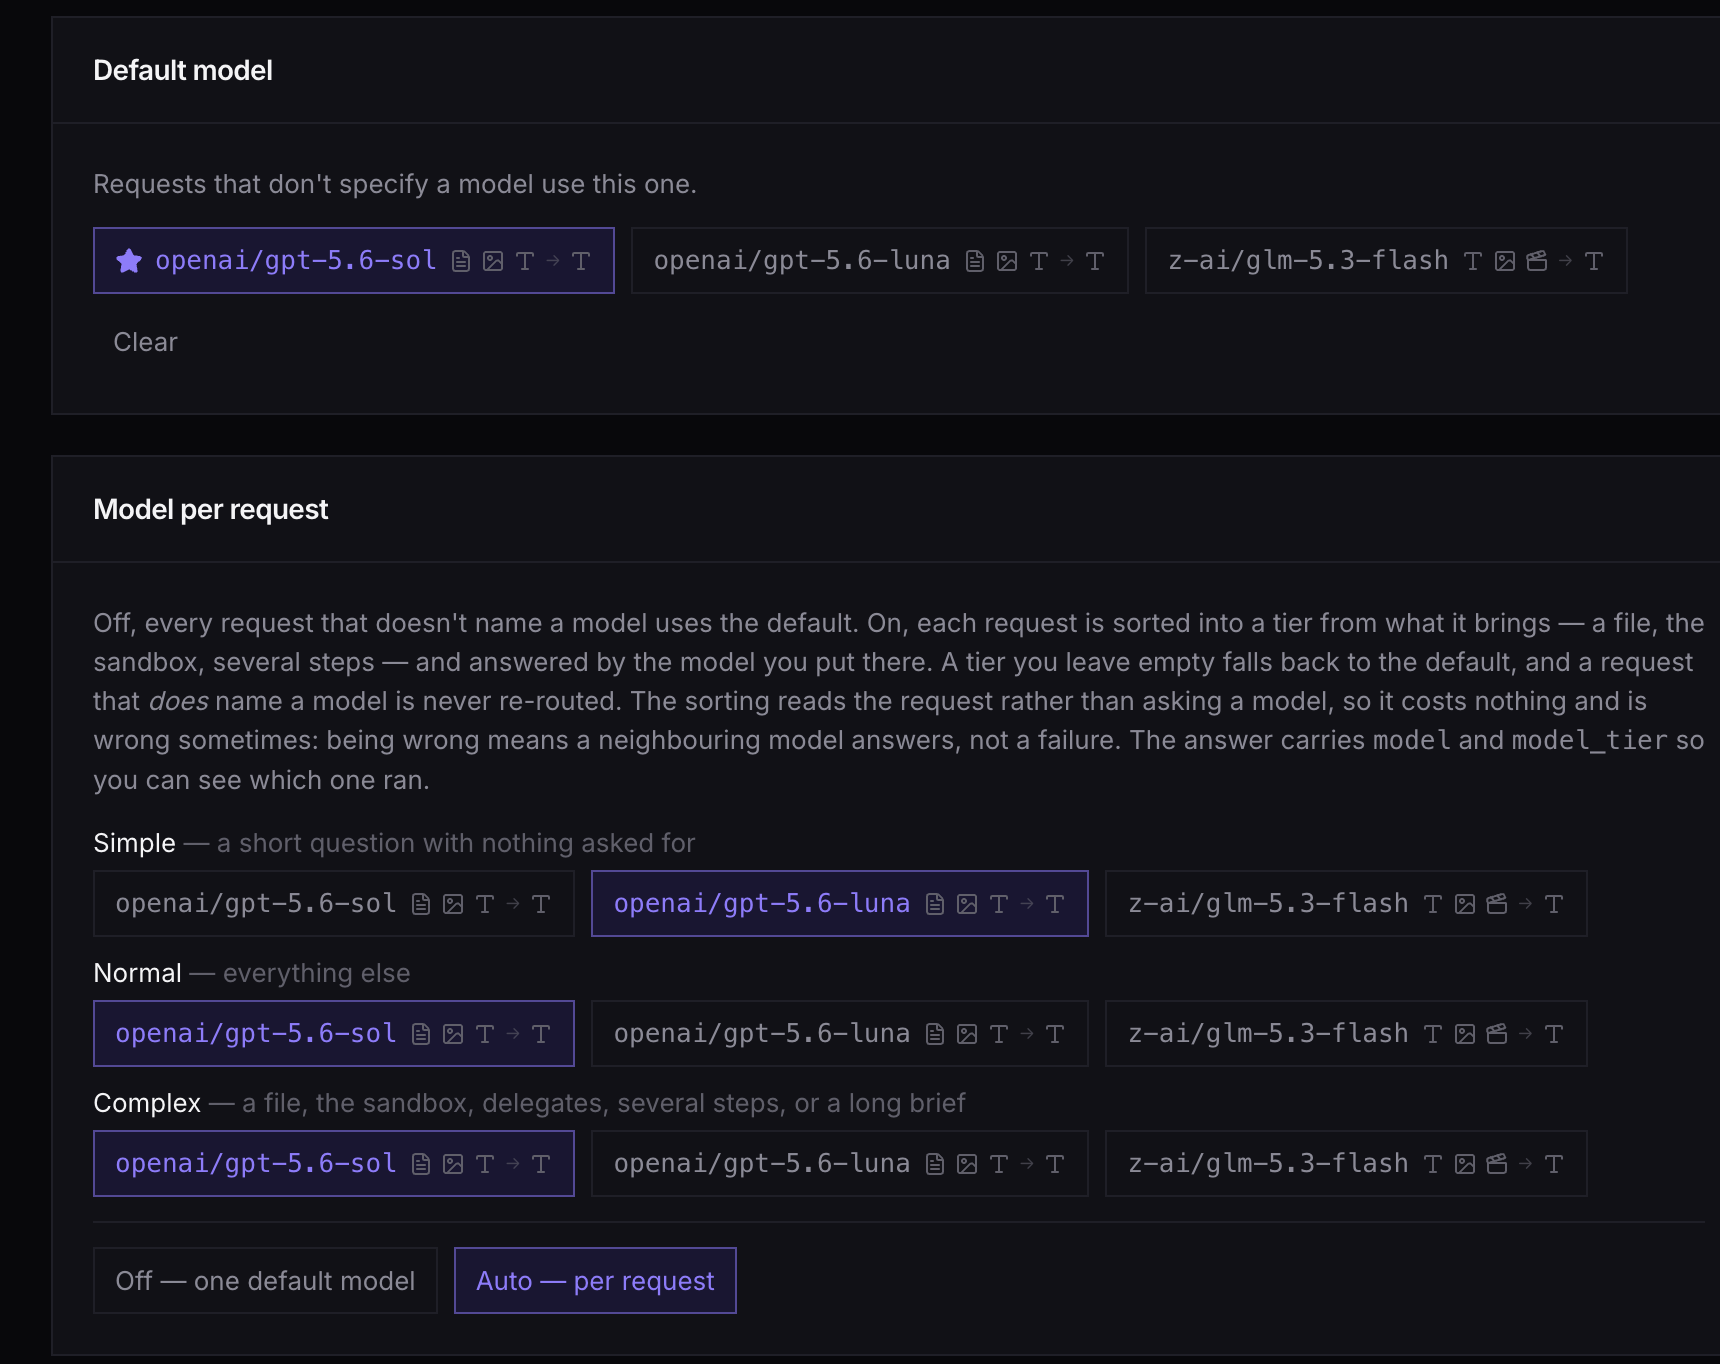
Default model and the optional per-request tiers.
Step 4
Embedding, and how PDFs are read
Source search needs an embedding model: pick one under Embedding & reranking (openai/text-embedding-3-large is a safe choice). Under Document processing decide who reads scanned pages that have no text layer; Automatic is fine. Changing the embedding model later means re-indexing your sources.
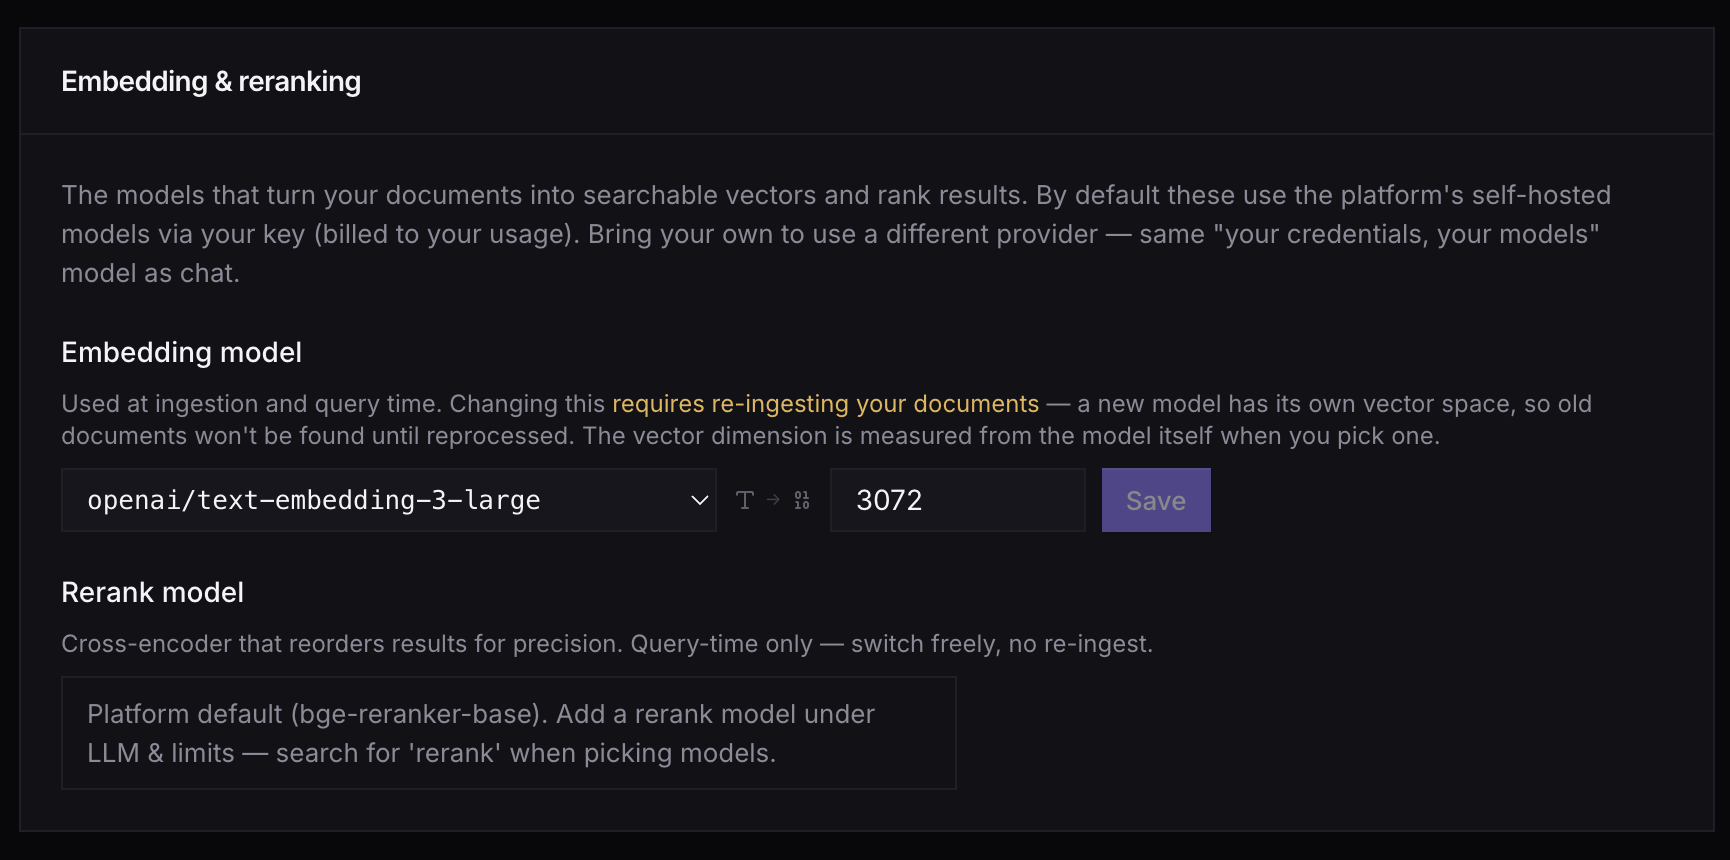
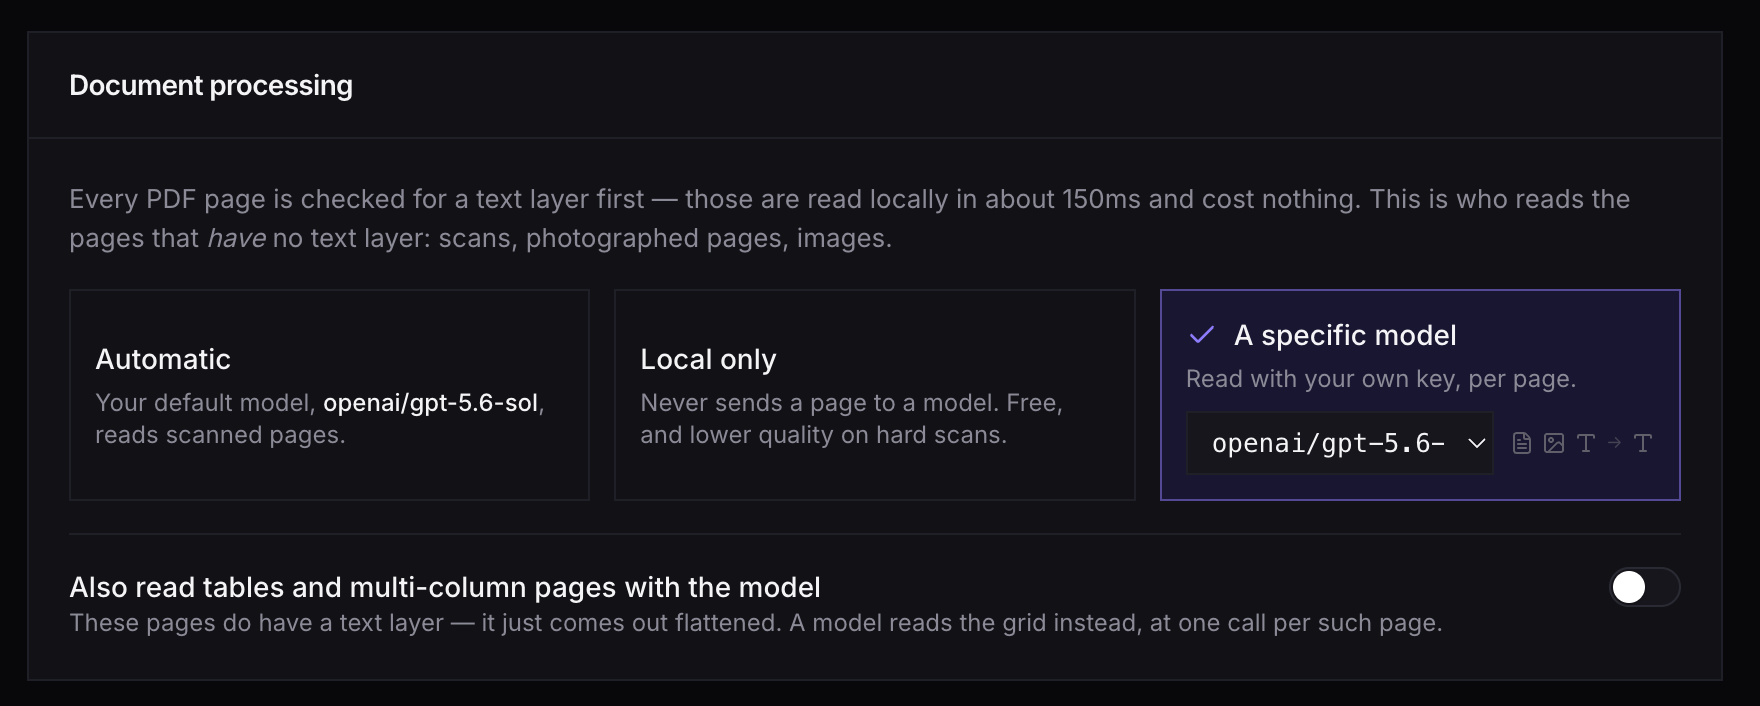
Embedding model, then document processing.
Step 5
Allow the capabilities
Under Allowed capabilities the app needs: Chat, Documents & RAG (source search and citations), Todo list, Computer / sandbox (diagrams and file conversions), and Web search & browse if you want the assistant to look things up. Under Multimodal turn on Image and File for input so you can drop a picture or a PDF into the chat, and File for output. What you leave off, the assistant simply cannot do.
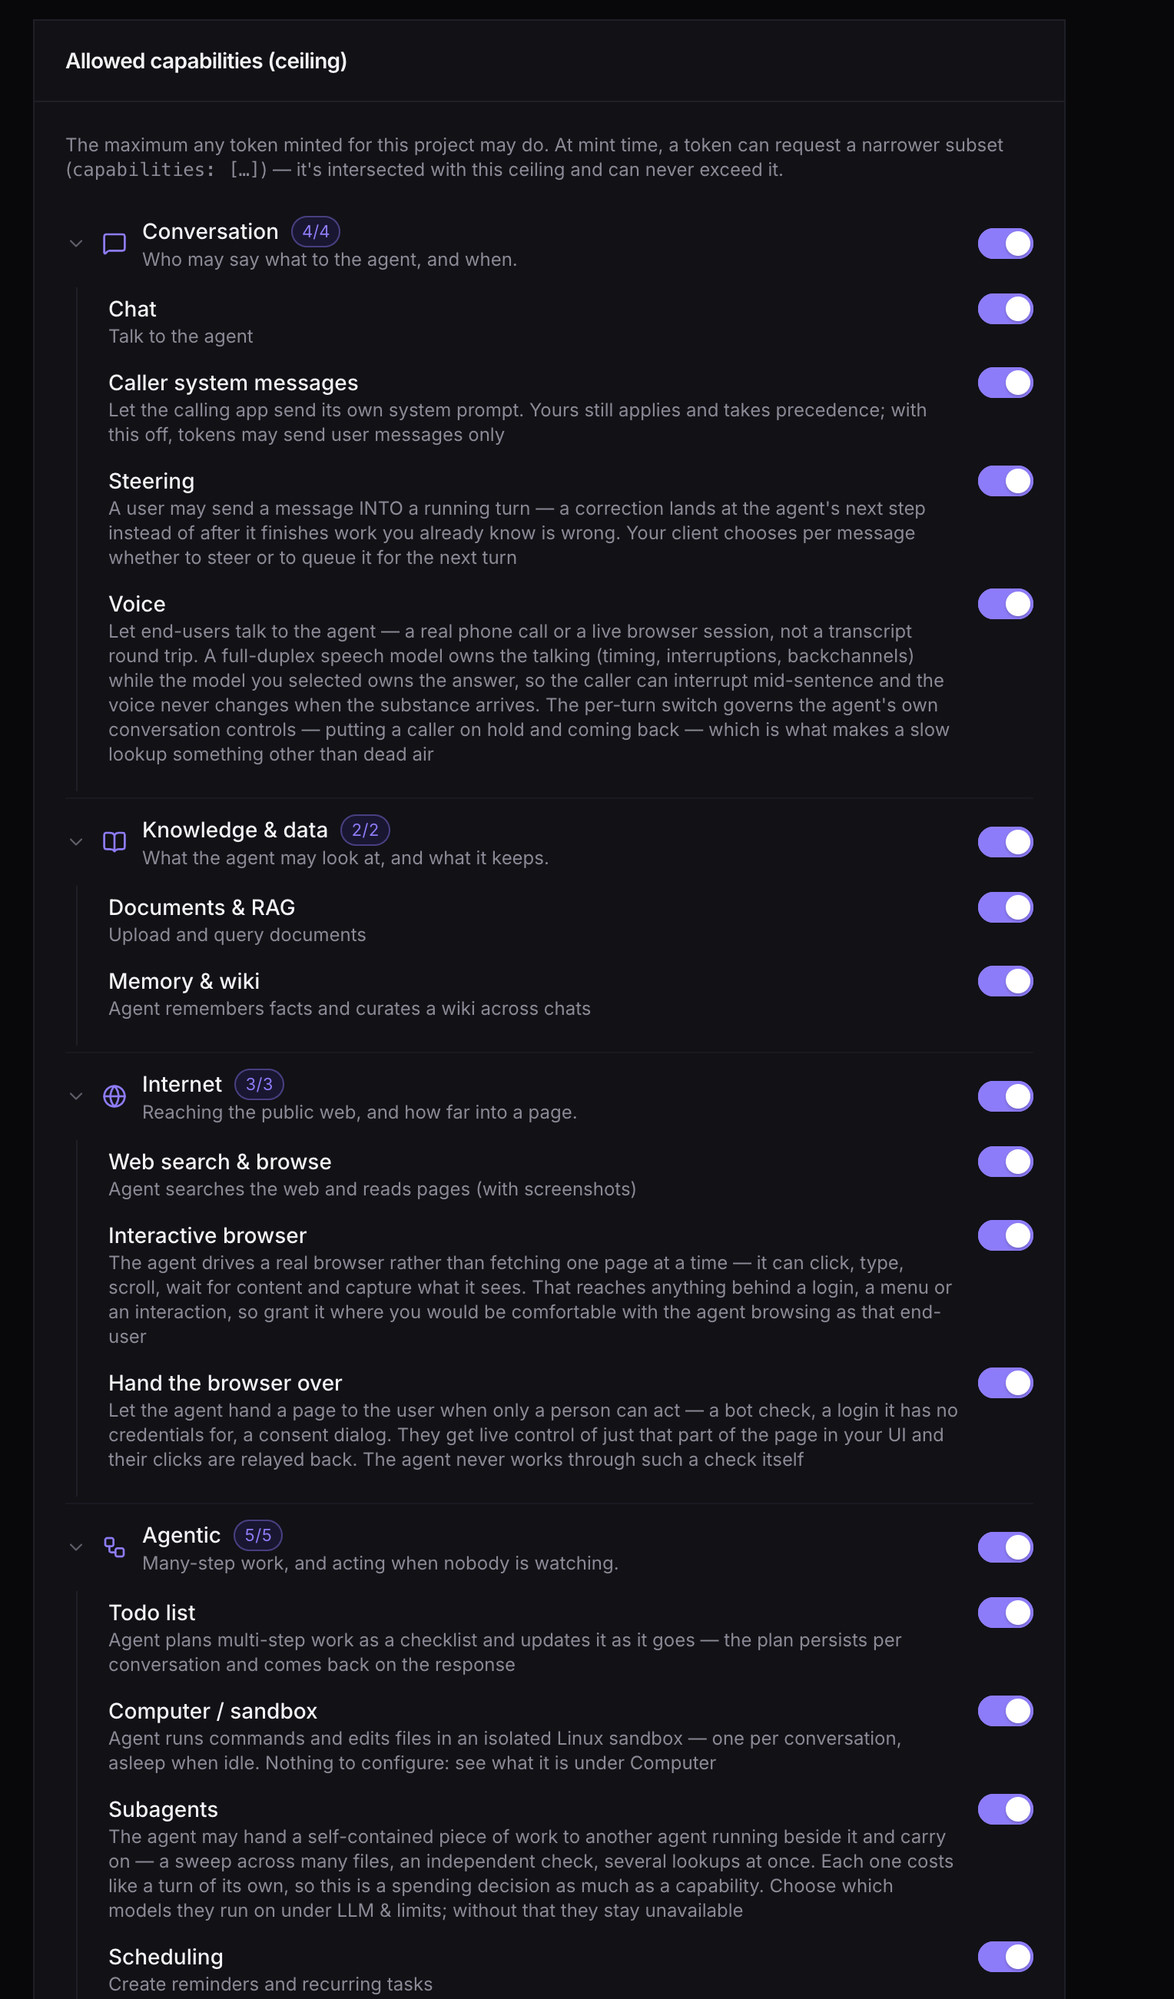
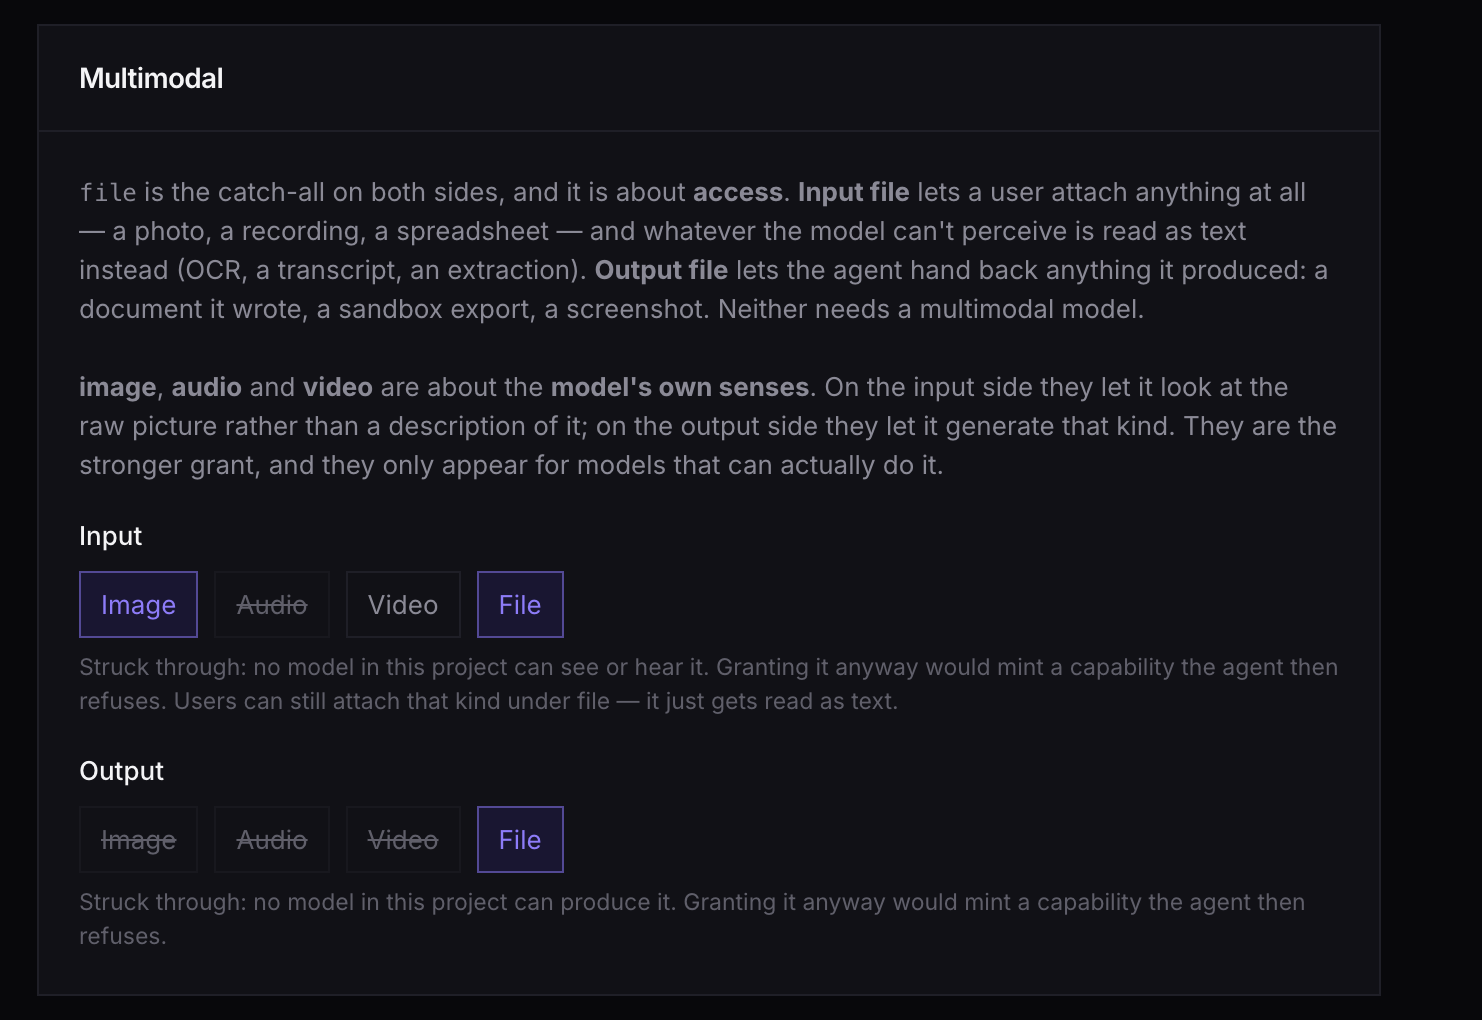
The capability ceiling, and the multimodal grants.
Step 6
Create the project key and copy the project id
Open API keys in the project and press New key. Copy the key that starts with pk_ right away; it is shown once. The project id is the UUID shown in Connect the SDK (projectId: "…"). Keep the key private: it can mint tokens and manage the project. Lecture Studio stores it in the macOS Keychain and never sends it to the assistant page, only short-lived tokens.

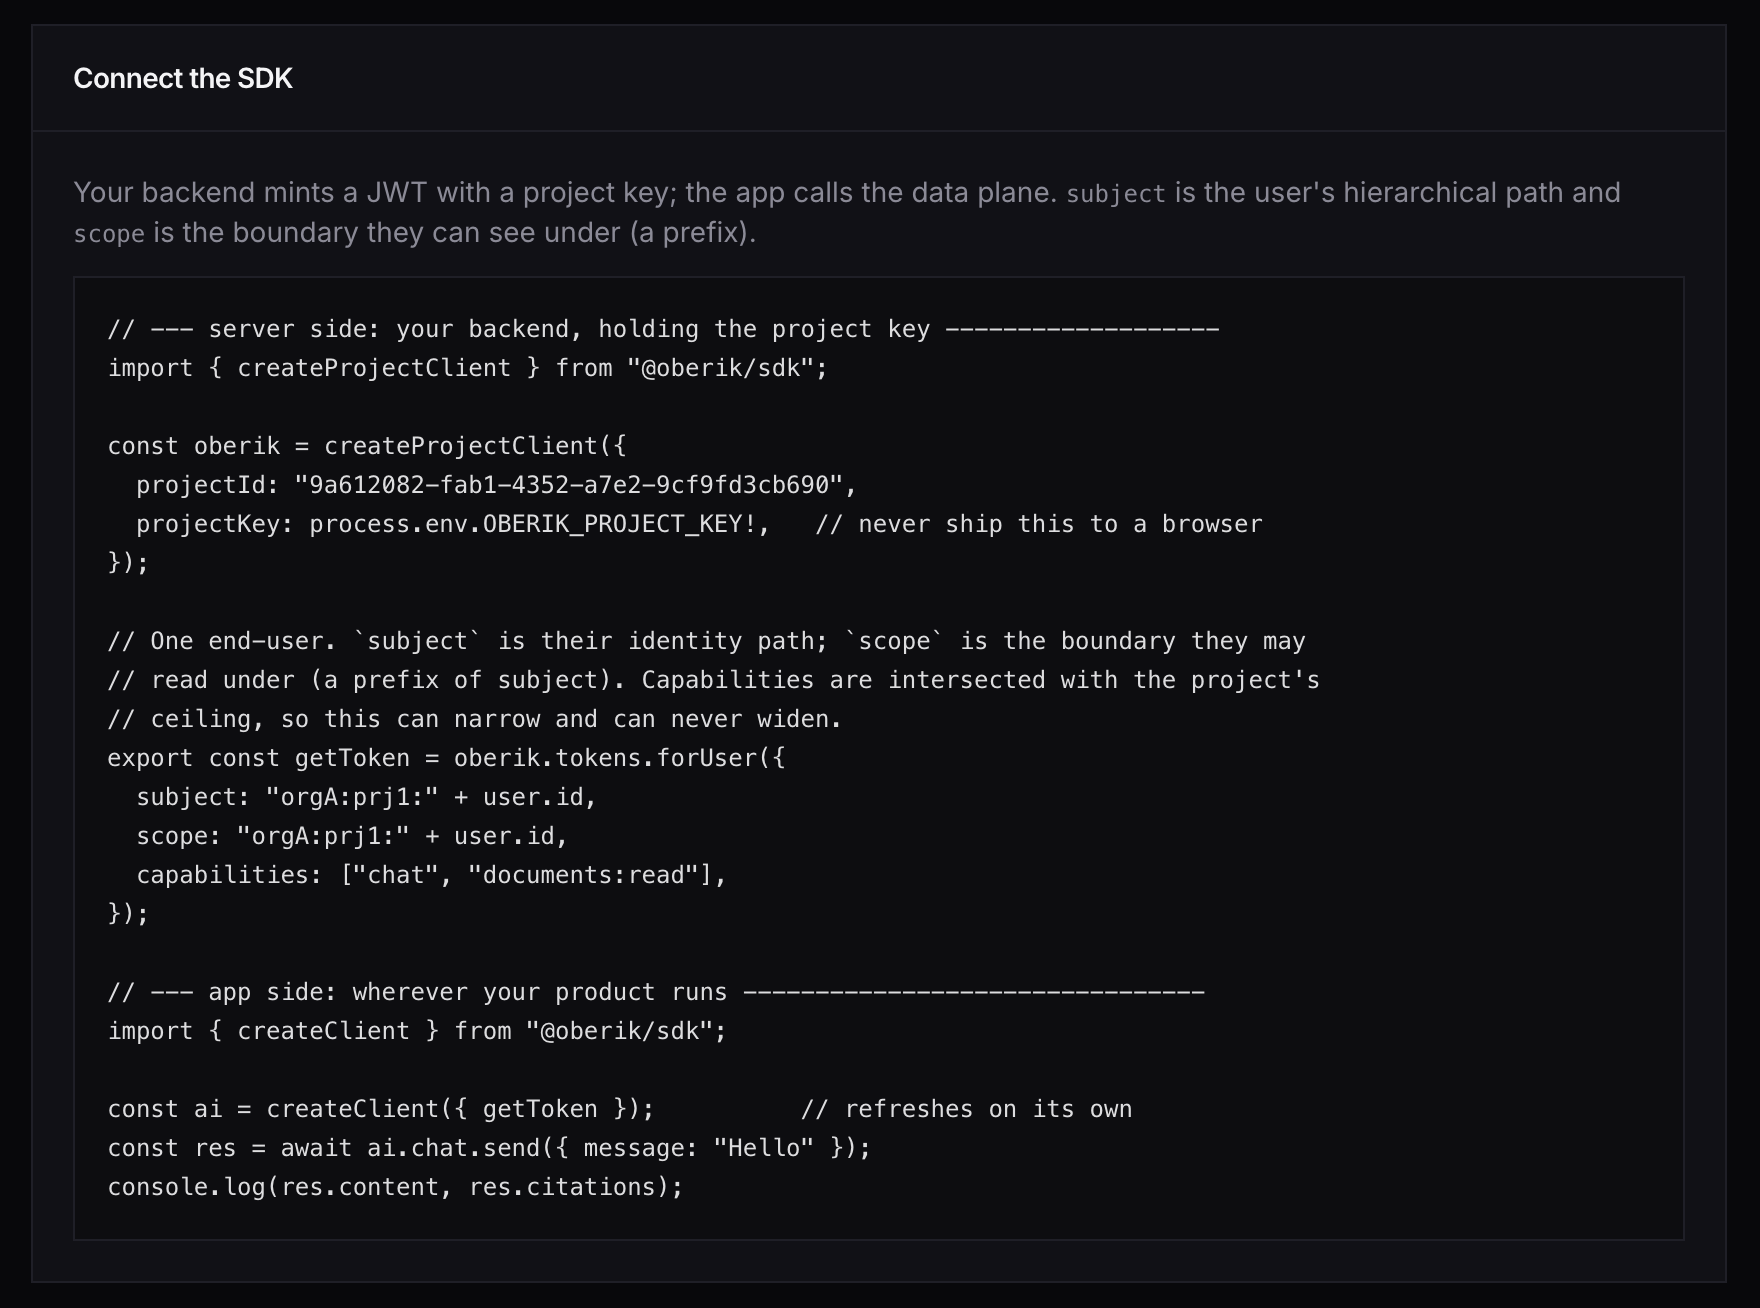
New key, and the project id in the SDK snippet.
Step 7
Back in Lecture Studio
- Open Settings (⌘,) and the Agent tab.
- Paste the project id and the project key, keep the subject as it is, press Save, then Test connection. A token is minted and the assistant replies with a word.
- Publish the deck-writing skills to the project once: in a checkout of the app's repository run
npm run skills:publish. It sets the system prompt, uploads the skill pack and allows the app's origin. (An in-app button for this is on the way.) - The Getting started checklist on the home screen ticks "Connect the assistant". Add sources, open a unit, and the chat is live.
Questions
Is Oberik free?
Oberik has its own sign-up and plans; the model calls are billed by your provider through the key you added. Lecture Studio is free during the beta.
Can several people share one project?
Yes, but private sources are visible only to the subject that indexed them. Keep one subject per person, or one project per person, so nobody sees another's material.
Where does the key live?
In the macOS Keychain on your Mac. The app mints short-lived tokens from it; the assistant page and the model never receive the key.
 Powered by Oberik